Bitrix24
This page is under construction...
Requirements for Integration with Bitrix24
To ensure a successful connection, the following requirements must be met:
To integrate aiokk with Bitrix24, you need an active Bitrix24 portal. Whether it’s cloud-based or self-hosted, it doesn’t matter.
Don’t have a Bitrix24 account yet? Fix this by registering your own cloud-based Bitrix24. If you prefer the self-hosted version, the MASNAGET Digital Studio team can assist you. Just submit a request on our website!
For self-hosted Bitrix24 users: Ensure you have an active subscription. Confirm that your portal has internet access and is not operating within a closed network.
Necessary permissions: You must have the right to install applications from the Bitrix24 Marketplace.
aiokk account: You must have a registered aiokk account. If you don’t have one yet, create an account following the instructions 👇
Steps for Installing the Application

Select “Bitrix24” as a Data Source
Navigate to Settings → Data Source.
Select Bitrix24 from the available sources.
Enter your existing Bitrix24 domain in the appropriate field.
For Cloud-Based Bitrix24 Portals: Click the “Check Connection” button, then click “Establish Connection”.
For Self-Hosted Bitrix24 Portals: You will need to additionally specify the licensing country of your portal. This ensures that we direct you to the correct regional page for our application in the Bitrix24 Marketplace.

Self-Hosted Bitrix24 Connection establishing guide
Install the aiokk Application from the Bitrix24 Marketplace
We will verify your Bitrix24 domain and open the portal in the current browser window.
If required, log in to the portal. If you’re already logged in, the aiokk application page in the Bitrix24 Marketplace will open directly.
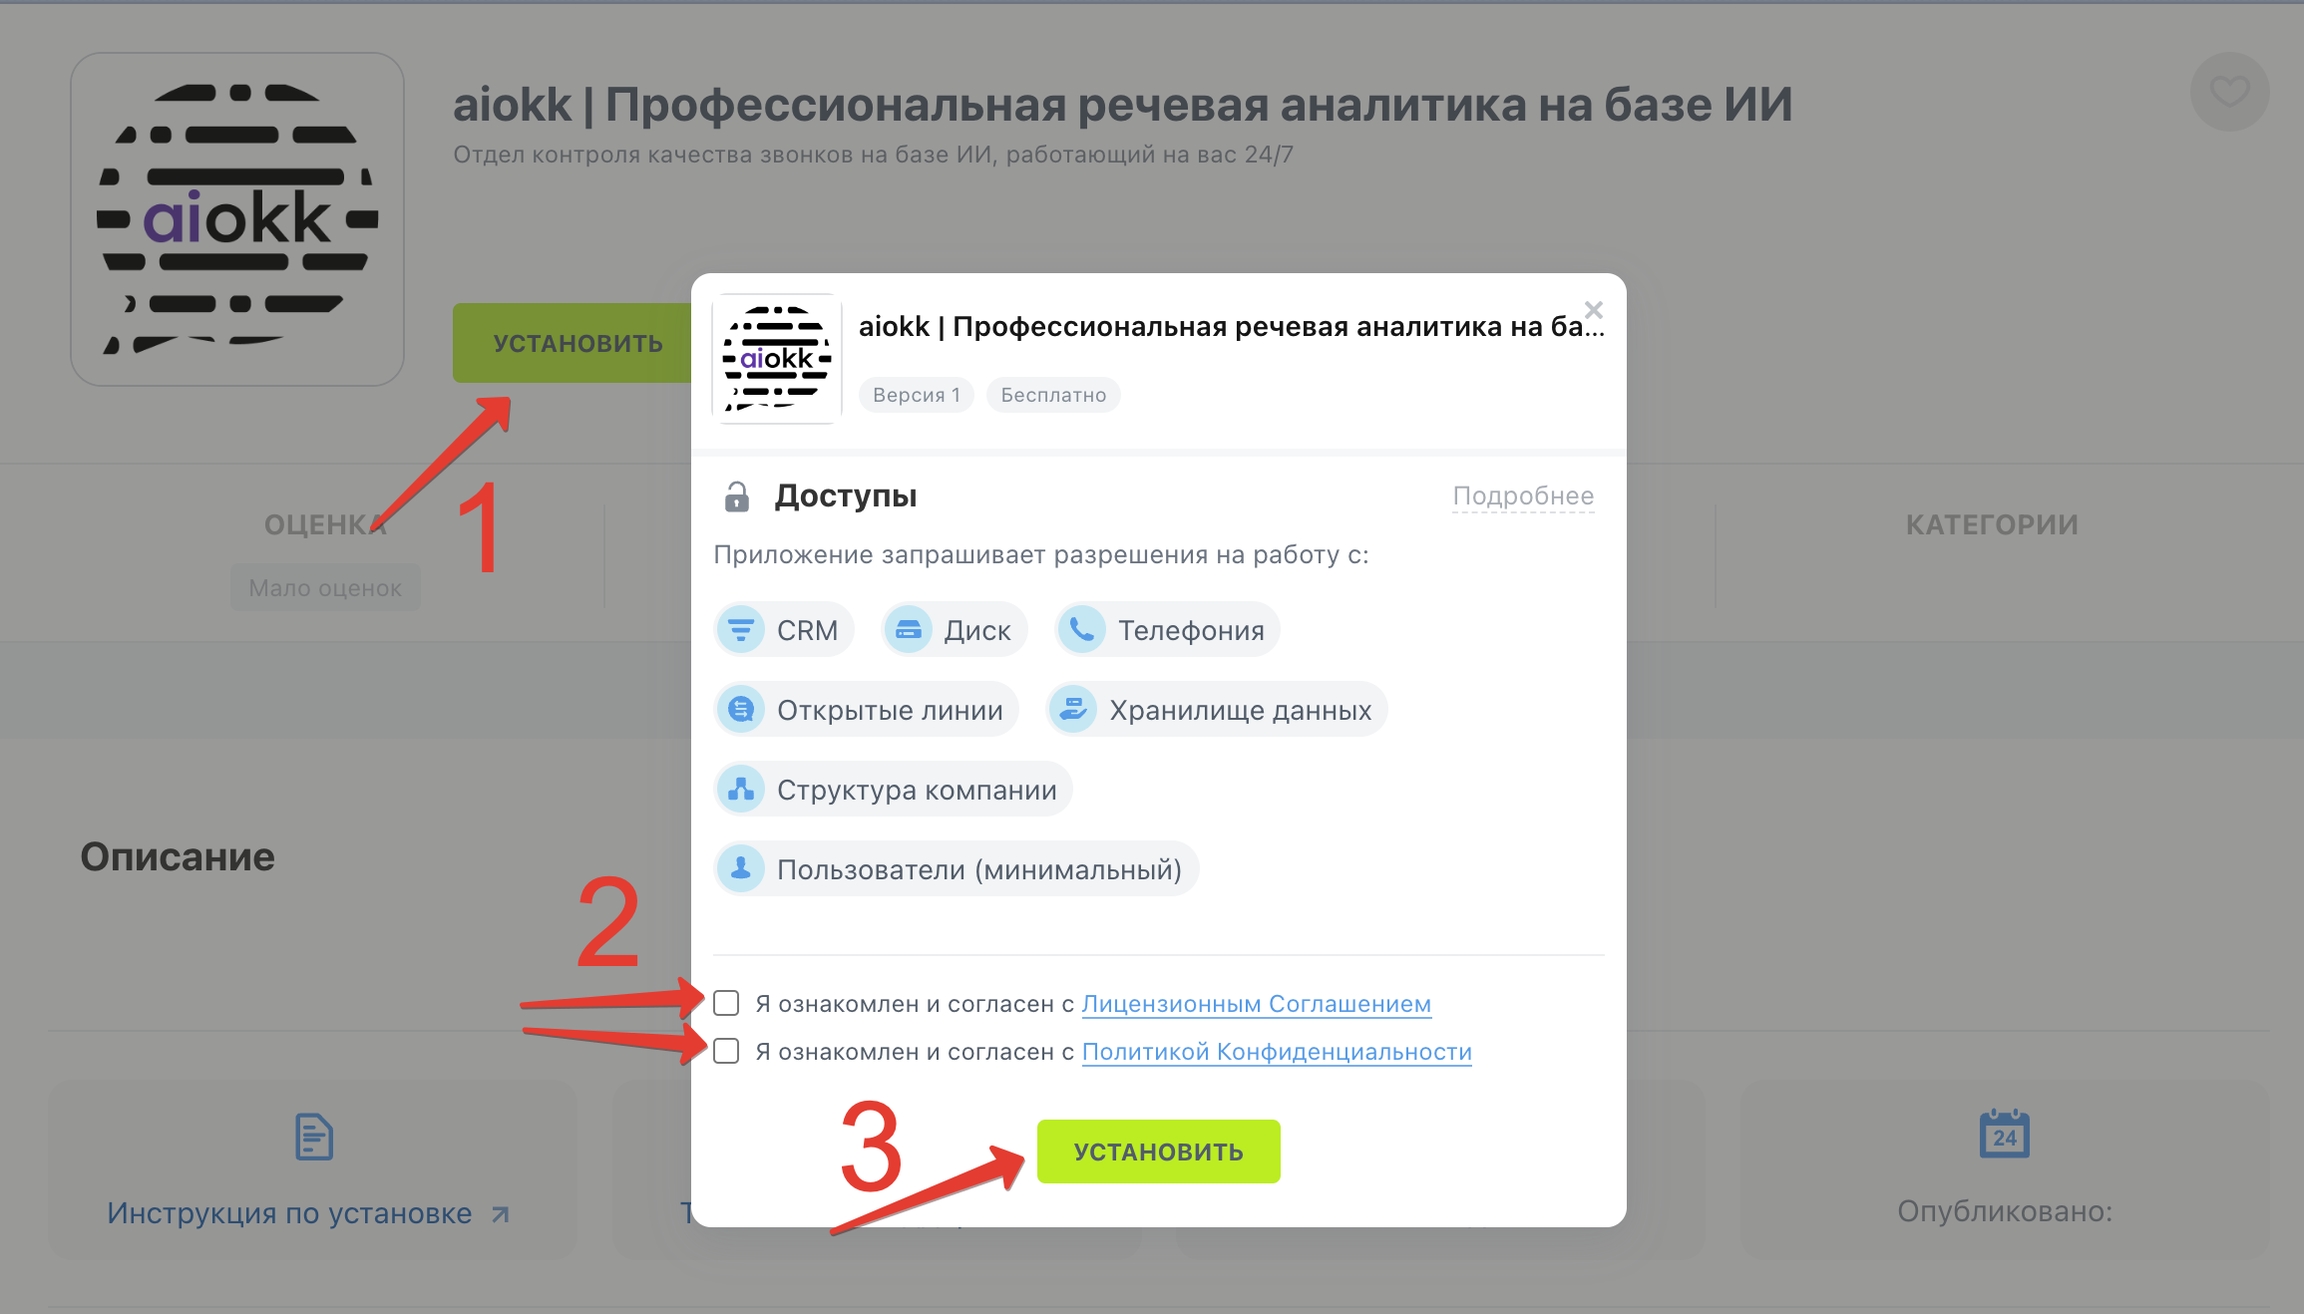
On the aiokk application page, click “Install”, review and accept the terms and conditions, and click “Install” again.

Open the aiokk Application: After installation, click “Open” in the installation window or refresh the page and access it from the left menu.
Establish Connection with Your aiokk Account
Open the application after installation and wait for it to fully load.
If the application has been installed correctly and the connection with your aiokk account is established, you will see the connection status and your login in the bottom left corner.

Great! The data source is connected. Return to your account in our service and continue the setup.
Last updated
Was this helpful?